Monday, September 5, 2011

Red Beans & Rice

I have no claim to Cajun Cuisine, other than a love for spicy foods. One of my favorites is the popular Red Beans and Rice. I have found that everyone seems to have their own recipe and heat preference, so I would love to share mine with you! Here's what you'll need:

For the Beans:
1 bag dry baby red beans
1 green bell pepper
1 white onion
6 stalks of celery
8-10 cups chicken stock
1 lb Conecuh sausage
12 oz. smoked ham
3 cloves garlic
1/2 cup fresh chopped parsley
1/2 cup green onion
2 bay leaves
3 teaspoons cayenne pepper
1 tablespoon creole seasoning
salt and pepper to taste

Rice: enough for however many you are serving!

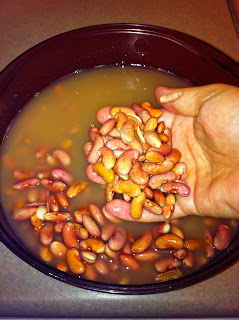
So to get things started, you need to boil about 4 cups of water and pour it over the dry beans. Let them soak for at least 5 hours. (you can do this over night)

When finished soaking, they will swell and crack a bit. This is normal!

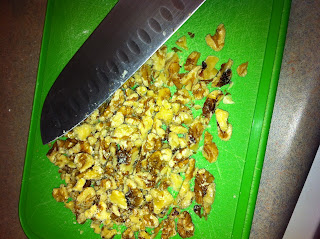
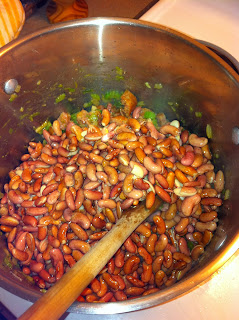
Now, we are going to get our "Holy Trinity" together. As I mentioned, people have their own versions of this, but I like to stick to celery, onion, and green bell pepper.
I like to get all the chopping out of the way at once, so when you are done with the veggies, grab your ham and sausage.
Cut the ham into small cubes and the sausage into quarter pieces.

Next, grab your big pot and add a tablespoon of oil. When it gets hot, put in your chopped ham and saute' it for a few minutes. When it is browned, add your chopped Holy Trinity.
You want to cook this mixture down until it becomes soft and nearly translucent. 15 minutes, medium heat. Now you can add your minced garlic.
Once this has cooked down a bit, add your sausage. I like the original Conecuh the best.
Allow this to get acquainted for a few minutes, then add your soaked beans, but not the water they were soaking in.
  Mix all of this together, then add your chicken stock. 
You want enough stock to cover the mixture completely, and then about an inch over.
And now we wait! Add your bay leaves and spices, and let this simmer for about 45 minutes on medium heat, then add a lid, turn to low, and simmer for about an hour and a half.

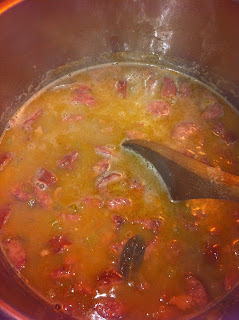
Keep an eye on it, and stir it every so often. When the beans have become soft, use a spoon to smash them on the sides of the pot. You can do this as little or as much as you like. The more you smash, the thicker it becomes. (I like it pretty thick!)

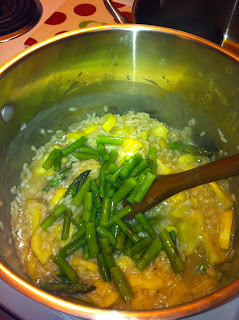
 When it reaches this point, you can start your rice. A little trick to give plain rice some flavor: add a chicken bullion cube to the pot while it cooks. Yum!

Also, now is a good time to add your fresh parsley. Mix it well, and simmer for another 30 minutes.


Ah! Finally, time to eat! Ladle some beans onto a plate or bowl, then scoop on some rice. Garnish with chopped green onions. 

Wednesday, August 3, 2011

Not Your Nana's Banana Nut Muffins

While some may turn their nose up to a bowl of browning bananas, I get excited. That's because they are ripe and soft enough for Banana Nut Muffins! Today, I put a little twist on my original Banana Nut Muffins by adding a fun ingredient: Chocolate!

These muffins are moist, sweet and delicious to the last bite!

You will need:
1 1/2 cups all purpose flour
3/4 cup sugar
1/2 teaspoon salt
2 teaspoons baking powder
1/2 cup dark brown sugar
1 egg
1/3 cup milk
1/3 cup veggie oil
4 very ripe bananas
1 teaspoon vanilla
2 teaspoons cinnamon
3/4 cup chopped walnuts
3/4 cup semi-sweet chocolate chips (you can leave this out!)

First, you want to preheat the oven to 350 degrees, then peel your bananas and break them in quarters:
Next, add the brown sugar, vanilla and cinnamon and mash it all together with a potato masher.
In a separate bowl, combine your dry ingredients: flour, salt, sugar and baking powder.
Next, grab a measuring cup, and fill it 1/3 with milk, then add the oil until it reaches the 2/3 mark. Add your egg, and lightly whisk with a fork.
Fold this mixture to your bananas. Then add your dry ingredients to the liquid.
 After you roughly chop the walnuts, you can add them and the chocolate chips to the mixture.

Now it is time to get them ready for the oven! I like to add a couple drops of water into the muffin pan to keep the liners from burning, and ensure the muffins are moist. 

After you place the liners in the pan, you can scoop your muffin mixture in. I like to use an ice-cream scoop so that my muffins are all the same size. 
Bake for 22-25 minutes, let cool, and enjoy!

Sunday, July 24, 2011

The Perfect Spice Rack

My boyfriend Joseph grew tired of me fumbling for my spices above the stove along with being summoned to the kitchen to get something that I could not reach, so he fashioned this neat spice rack, and put it right at arm's length! I love this rack because sometimes I may need some inspiration for flavors, and I have several within eyesight here.
You can order the magnetic canisters online, and they come with just about any spice label you can think of. Notice, I did not bother labeling the salt or pepper... They are pretty obvious!

Saturday, July 23, 2011

Summertime Risotto

Inspired by a roadside produce stand, I felt the urge to include one of my favorite vegetables in a classic dish. Bright yellow squash, crisp green baby asparagus and farm-raised salmon make this risotto a fresh and colorful plate sure to impress!

Coming home to Huntsville from Birmingham in the middle July, you are sure to pass several local produce stands with some of the most flavorful fruits and vegetables. It's tempting to overlook everything and go straight for the peaches, but something about produce shopping in the sunlight makes the entire assortment look irresistible.

One vegetable in particular caught my eye: yellow squash. It has always been one of my favorites, so I bought it without any particular plans for it. It wasn't until a few days later that I realized I'd never attempted to cook the infamous but delicious rice dish, risotto.

After a little research on the technique, I felt confident about incorporating my beautiful squash along with some other key ingredients into this tasty dish.

Ingredients:

4 cups chicken stock
2 cups arborio rice
2 plump yellow squash
1 bundle baby green asparagus
1 diced white onion
2 tbsp olive oil
1 tbsp butter
1/2 cup dry white wine (optional)
2 cups fresh grated Parmesan cheese
1 lb farm-raised fresh salmon

First things first: put your chicken stock in a large pot and simmer. 
Next, prepare your vegetables by dicing the onion into small uniform pieces, dicing the squash into bite sizes chunks, and the asparagus into 1-inch long stems.
Now it's time to get the risotto started. To prepare, you want to heat 2 tbsp olive oil and 1 tbsp butter in a large pot. When the butter melts, add your diced onion. After the onions have become translucent, add the arborio rice. Over medium heat, toast the rice for a few minutes. Now you are ready to add the wine! Be careful, because it will evaporate quickly! Set this aside so you can prep the rest of the ingredients.
In the meanwhile, let's prepare our fish! For this particular dish, I like to keep it simple, by only using a little sea salt and fresh cracked pepper. Place your fish on a piece of foil and put it in a pan. Bake in a 400 degree oven for 15 minutes.

For the asparagus, you want to blanch the tough stems in salted water. Leave the tips aside, as they are more tender and don't need to cook as long. Boil the stems for 5 minutes, then place them in an ice bath to stop the cooking process and keep them a bright green color.
Because squash cooks pretty quickly, you only need to saute' it for a couple minutes. So, in a small saute' pan add 1 tbsp olive oil, squash, and asparagus tips. Cook over medium heat for 2-3 minutes. Season with a pinch of salt and pepper.
Now that our risotto components are individually ready, it is time to get the risotto going. First, get your toasted rice mixture back up to heat and cover with already heated chicken stock (about 2 ladles or 1 cup). Stir the pot until the liquid evaporates.Repeat this process 2 ladles at a time until the rice is al dente.
After your last ladle of stock, add your squash and asparagus. Now is the time to salt and pepper your risotto to taste.
After most of the liquid has evaporated from the rice, add 1 1/2 cups of the fresh grated Parmesan cheese and mix thoroughly. 
After you have mixed all the last ingredients, spoon some risotto onto a plate, top with the baked salmon and garnish with Parmesan. Enjoy with a glass of white wine!